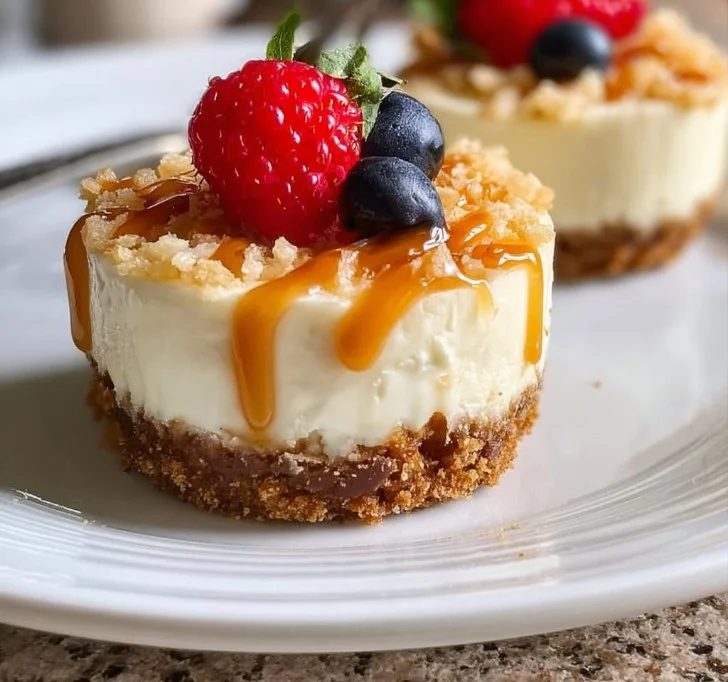
No-Bake Mini Cheesecakes
There’s something magical about mini cheesecakes, isn’t there? Whether it’s at a family gathering or a cozy night in, these little treats bring joy with every bite. I remember the first time I tried a no-bake version; it was an instant hit! The creamy, rich filling, combined with a buttery crust, felt like a sweet hug. Not to mention, they are so easy to whip up! Let’s take a journey into making these delightful, no-bake mini cheesecakes that will impress everyone.
What Makes This Recipe Special
What makes these no-bake mini cheesecakes special is their incredible balance of flavor and texture. The cream cheese filling is smooth and creamy, without the need for baking, which keeps it light and fluffy. Plus, you can prepare them in just about 30 minutes—perfect for unexpected guests or a special treat. With versatile toppings, they can easily adapt to suit any occasion!
Ingredients
-
For the crust:
- 1 cup graham cracker crumbs (or digestive biscuits)
- 1/4 cup granulated sugar
- 1/2 cup unsalted butter, melted
-
For the filling:
- 8 oz cream cheese, softened
- 1/2 cup powdered sugar
- 1 teaspoon vanilla extract
- 1 cup whipped cream (or heavy cream whipped until soft peaks form)
-
Optional toppings:
- Fresh fruits (strawberries, blueberries, or raspberries)
- Chocolate ganache
- Caramel sauce
Instructions
To start your mini cheesecakes, first whip up the crust. In a medium bowl, mix together the graham cracker crumbs and granulated sugar. Then, pour in the melted butter and blend until it resembles wet sand. Press this mixture firmly into the bottom of your mini cheesecake cups to create a solid base.
Now, it’s time for that rich filling. In a separate bowl, combine the softened cream cheese, powdered sugar, and vanilla extract. Mix until smooth. Gently fold in the whipped cream, being careful not to deflate it too much. This folding process brings air into the mixture, making it light.
Next, spoon the creamy filling onto the crust in each mini cup, smoothing the tops as you go. Once filled, place the cheesecakes in the refrigerator for at least 4 hours, or overnight if possible. These flavors deepen beautifully with time!
Serving Suggestions
Serve these delightful mini cheesecakes at any gathering—birthdays, summer BBQs, or even just a cozy movie night. To elevate the presentation, top each cheesecake with a dollop of whipped cream and sprinkle fresh berries or chocolate shavings on top. They’re perfect for sharing or indulging in alone!
Tips or Variations
Feel free to experiment with your mini cheesecakes! Try different flavor extracts like almond or citrus for a refreshing twist. For a vegan option, substitute the cream cheese with a plant-based version, and use coconut cream instead of dairy cream. You can also adjust the sweetness by using stevia or honey in place of sugar.
Q&A Section
Q: Can I make these ahead of time?
A: Yes! In fact, they taste even better the day after making them, allowing the flavors to meld together beautifully.
Q: How can I thicken my filling?
A: If your filling is too runny, ensure your cream cheese is fully softened and you can also add more powdered sugar for additional thickness.
Q: Can I freeze these mini cheesecakes?
A: Absolutely! They freeze well. Just make sure to cover them tightly before popping them in the freezer. Thaw in the fridge before serving.
Q: What if I don’t have mini cheesecake cups?
A: You can use regular muffin tins or even dessert glasses. Just adjust the crust and filling amounts accordingly.
Behind The Scenes
When I first developed this recipe, the process was quite the learning curve! My first few attempts resulted in crusts that wouldn’t hold together or fillings that were either too runny or overly thick. After many trials, achieving that perfect balance was so rewarding. Now, every time I make these, I remember those early experiments with a nostalgic smile.
Final Thoughts
Enjoying these mini cheesecakes is all about sharing joy with those you love. They’re a versatile dessert that can be tailored to any occasion, whether it’s a sweet treat after dinner or a picnic delight. For more inspiration, check out these delicious mini no-bake cheesecakes for various flavor combinations. Additionally, if you’re looking for an easy guide, visit this resource for no-bake mini cheesecakes.
I can’t wait for you to try these! Let me know how your mini cheesecakes turn out!
No-Bake Mini Cheesecakes
Ingredients
Method
- In a medium bowl, mix together the graham cracker crumbs and granulated sugar.
- Pour in the melted butter and blend until it resembles wet sand.
- Press this mixture firmly into the bottom of your mini cheesecake cups to create a solid base.
- In a separate bowl, combine the softened cream cheese, powdered sugar, and vanilla extract.
- Mix until smooth.
- Gently fold in the whipped cream, being careful not to deflate it too much.
- Spoon the creamy filling onto the crust in each mini cup, smoothing the tops as you go.
- Once filled, place the cheesecakes in the refrigerator for at least 4 hours, or overnight if possible.


