Discovering the Magic of Burnt Cream
There’s something enchanting about the first time you taste burnt cream. I remember the moment vividly—a quaint little bistro tucked away in a cobbled alley of Paris. The rich aroma wafted over, beckoning me closer. I finally took my first dip into the velvety custard, topped with a delicate, crunchy caramelized layer that shattered like glass. I was hooked! This delightful treat, known as crème brûlée, became a cherished dessert in my kitchen ever since.
What Makes Burnt Cream Special
Burnt cream is such a showstopper, combining the luxuriousty of a smooth custard with a crisp, caramel topping that’s just begging to be cracked open. The golden layer adds an unexpected textural contrast, making each spoonful an experience of delightful opposites—creamy versus crunchy. Plus, it’s surprisingly simple to make and perfect for impressing guests or indulging in a sweet moment alone.
Ingredients
- 2 cups heavy cream: You can replace it with coconut cream for a non-dairy option.
- 4 large egg yolks: Ensure they’re at room temperature for best results.
- 1/2 cup granulated sugar: Feel free to swap with coconut sugar for a deeper flavor.
- 1 teaspoon pure vanilla extract: Real vanilla makes all the difference!
- Pinch of salt: Enhances all the flavors.
Let’s Get Cooking!
To kick off, preheat your oven to 325°F (160°C). This initial warmth is essential for a beautifully set custard.
Begin by heating the heavy cream gently in a saucepot over medium heat. You’re looking for small bubbles forming at the edges, not a rolling boil. Once you see that, remove it from heat and stir in the vanilla extract. This is where the air becomes infused with comforting scents.
In a bowl, whisk together the egg yolks, sugar, and pinch of salt until the mixture turns pale and creamy. It should look silky and inviting—don’t rush this step; take a moment to appreciate it!
Now, slowly pour the warm cream into the yolk mixture, whisking continuously. This gradual addition keeps the eggs from scrambling—nobody wants bits of scrambled eggs in their luscious dessert! Once combined, strain the mixture through a fine-mesh sieve to ensure it’s perfectly smooth.
Divide the mixture among four ramekins, placing them in a baking dish. Then, fill the baking dish with hot water until it reaches halfway up the sides of the ramekins—this gentle heat helps the custard cook evenly.
Introducing this to the oven, allow it to bake for about 30-35 minutes or until the edges are set but the centers still tremble slightly—it’s not quite jiggly, but just shy of being firm. Remove from the oven, let the ramekins cool to room temperature, and then chill them in the refrigerator for at least two hours (or overnight for best results).
Here comes the final show-stopping part! Once your custards are chilled, sprinkle a thin, even layer of granulated sugar on top. Using a kitchen torch, caramelize the sugar until it transforms into that beautiful crisp, golden crust. If you don’t have a kitchen torch, you can pop them under the broiler for a minute or two—just keep a watchful eye!
Allow the caramelized tops to harden for a minute before serving.
Serving Suggestions: A Timeless Treat
Burnt cream can be served on its own or paired with fresh berries for a refreshing twist. A sprig of mint on top adds a lovely pop of color while enhancing the overall presentation. If you’re feeling a bit adventurous, drizzle a touch of honey or a fruit compote on the side for an extra layer of flavor.
Tips and Variations
- Flavor Infusions: Consider adding a bit of espresso powder to the cream for a coffee-flavored twist.
- Chai Spice: Stir in some chai spices for a warm, aromatic version.
- Vegan Delight: Replace the cream with almond or cashew cream and use flaxseed egg substitutes.
- Mix It Up: Try adding a splash of liqueur, like Grand Marnier or Amaretto, to the custard mixture for extra richness.
Q&A Section
Q1: Can I make this ahead of time?
Absolutely! Burnt cream can be made a couple of days ahead and kept in the fridge until you’re ready to torch the tops.
Q2: What do I do if I don’t have ramekins?
You can use any oven-safe dish. Just adjust baking times as needed.
Q3: Can I flavor the burnt cream differently?
Definitely! Consider adding citrus zests, herbs like lavender, or spices to the cream for unique variations.
Q4: How can I store leftovers?
Cover the custards with plastic wrap and store in the refrigerator for up to three days. Just re-crust the tops before serving!
Behind the Scenes
When I first tried making burnt cream, I was overly enthusiastic with my torching. I quickly turned a beautiful dessert into a charred disaster! After a few trial runs, I learned just how delicate the sugar needs to be caramelized—watching the transformation is half the fun.
Final Thoughts
Burnt cream is not just a dessert; it’s an experience. Perfect for summer dinners or cozy winter evenings, this treat is bound to leave an impression on anyone lucky enough to share it with you. Serve it at dinner parties, holiday gatherings, or alongside a cozy book after a long day. It pairs wonderfully with a glass of dessert wine or a steaming cup of coffee.
Can’t wait for you to give it a try and fall in love with it as I have! Let me know how yours turns out!
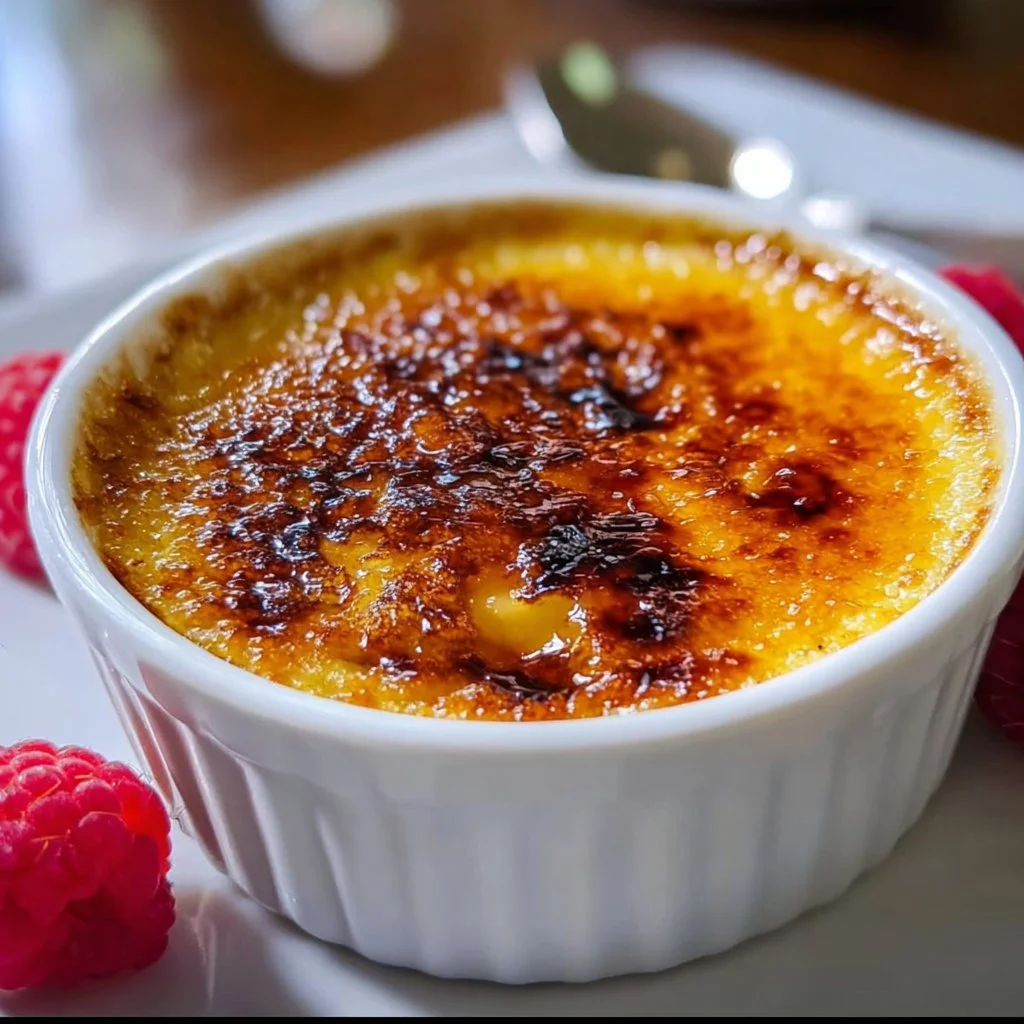
Burnt Cream
Ingredients
Method
- Preheat your oven to 325°F (160°C).
- Heat the heavy cream in a saucepot over medium heat until small bubbles form at the edges, then remove from heat and stir in the vanilla extract.
- In a bowl, whisk together the egg yolks, sugar, and pinch of salt until the mixture turns pale and creamy.
- Slowly pour the warm cream into the yolk mixture, whisking continuously to prevent the eggs from scrambling.
- Strain the mixture through a fine-mesh sieve to ensure it’s perfectly smooth.
- Divide the mixture among four ramekins and place them in a baking dish.
- Fill the baking dish with hot water until it reaches halfway up the sides of the ramekins.
- Bake for about 30-35 minutes until the edges are set but the centers still tremble slightly.
- Remove from the oven, let the ramekins cool to room temperature, and then chill in the refrigerator for at least two hours (or overnight for best results).
- Once chilled, sprinkle a thin layer of granulated sugar on top of each custard.
- Using a kitchen torch, caramelize the sugar until it transforms into a golden crust. Alternatively, use a broiler for 1-2 minutes, watching closely.
- Allow the caramelized tops to harden for a minute before serving.


