Red Velvet Cheesecake Brownies – Rich and Decadent Dessert
There’s something truly magical about the swirl of reds and whites in a dessert that tells a story of joy and celebration. I remember the first time I saw red velvet cake — it was my mom’s special occasion treat that never failed to brighten the table. Her delicious creation inspired my venture into the world of desserts, and thus, Red Velvet Cheesecake Brownies were born. They merge the classic richness of red velvet with a luscious cream cheese layer. Trust me, each bite is a delightful nod to nostalgia.
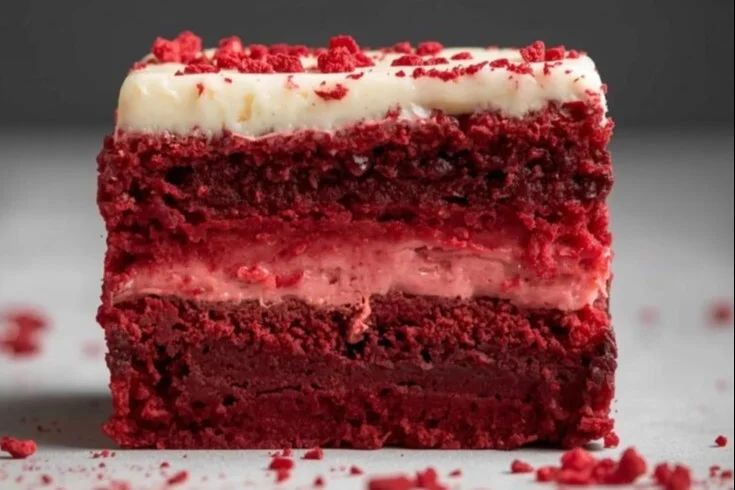
What makes these brownies stand out is the perfect marriage of texture and flavor. The dense fudge brownie base acts like a velvety canvas, while the creamy cheesecake layer adds a delightful contrast that makes each bite feel indulgent. Plus, this dessert is fuss-free. You don’t need to be a baking expert to create a showstopper that impresses at any gathering.
Ingredients
-
For the brownie base:
- 1 cup unsalted butter
- 2 cups granulated sugar
- 4 large eggs
- 1 teaspoon vanilla extract
- 1 1/2 cups all-purpose flour
- 1/2 cup unsweetened cocoa powder
- 1 teaspoon baking powder
- 1 teaspoon salt
- 1 tablespoon red food coloring (gel works best)
-
For the cheesecake layer:
- 16 oz cream cheese, softened
- 1/2 cup granulated sugar
- 2 large eggs
- 1 teaspoon vanilla extract
- 1 tablespoon all-purpose flour (optional, for stability)
Feel free to switch out the food coloring with natural alternatives, or even tweak the sugar levels to suit your taste!
Directions
Let’s dive right into this decadent experience! Start by preheating your oven to 350°F (175°C). While the oven warms up, grab a 9×13-inch baking dish and lightly grease it or line it with parchment paper for easier removal later on!
Next, it’s time for the brownie base! In a medium saucepan over low heat, melt the butter. Once it’s completely melted, remove it from heat and whisk in the sugar until combined. Now, gently fold in the eggs one at a time, followed by the vanilla extract. This mixture should feel smooth and shiny once combined.
In a separate bowl, sift together the flour, cocoa powder, baking powder, and salt. Gradually add the dry ingredients to your butter-sugar-egg mixture, mixing until just combined. Now, for that rich red velvety touch! Stir in the red food coloring, ensuring that it’s mixed evenly throughout.
Once your base is ready, pour half of this delicious batter into your prepared baking dish, spreading it evenly.
Now, let’s whip up that cheesecake layer! In a large bowl, beat the softened cream cheese until creamy and smooth. Gradually add the sugar and mix well. Next, add in the eggs one at a time, ensuring that each is well incorporated before adding the next. Finally, stir in the vanilla extract. If you opted for it, add the flour for extra stability.
Spread the cheesecake mixture over the brownie base, smoothing it out gently. Now, pour the remaining brownie batter on top, and with a knife or spatula, swirl it gently to create that marbled effect we all love.
Pop the baking dish into your preheated oven and let it bake for about 35-40 minutes. You’ll know it’s done when a toothpick inserted comes out with a few moist crumbs. Allow the brownies to cool completely in the baking dish before slicing into squares.
Serving Suggestions
Serve these brownies warm, drizzled with a bit of dark chocolate sauce or a scoop of vanilla ice cream. They also play beautifully with fresh berries like raspberries or strawberries for a fresh contrast. For a fun twist, dust the top with some powdered sugar for an elegant finish.
Tips and Variations
Want to play with flavors? Consider adding a touch of peppermint extract for a festive kick, or fold in mini chocolate chips for an added texture. If you’re looking for a vegan version, swap out the cream cheese for a plant-based alternative and use flax eggs instead of regular eggs. You could even press a layer of crushed cookies or nuts into the base before adding the cheesecake layer for a delightful crunch!
Q&A Section
1. Can I make these brownies ahead of time?
Absolutely! These brownies maintain their flavor and texture beautifully for a couple of days. Just store them in an airtight container in the fridge.
2. Can I freeze these brownies?
Yes! After they’ve completely cooled, cut them into squares, wrap them tightly in plastic wrap, and store in a freezer-safe container. They can last up to three months in the freezer.
3. What can I use if I don’t have red food coloring?
If you’re looking for a natural alternative, beet juice works wonderfully, adding not only color but also a subtle sweetness.
4. What if I don’t have cream cheese?
You can substitute cream cheese with Greek yogurt for a lighter take, though the flavor will be slightly different. Another option is mascarpone for a rich texture.
Behind The Scenes
When I first set out on this baking adventure, I had a couple of mishaps. The first batch ended up too dry because I overbaked them. After leveling out my baking time and testing for doneness, the perfect balance of fudge and creaminess emerged! The swirling technique was also a delightful experiment; each time creating a unique design was like an edible work of art.
Final Thoughts
These Red Velvet Cheesecake Brownies are perfect for celebrating life’s small moments — a cozy evening in, a potluck among friends, or even an impromptu treat for yourself after a long day. To amplify the experience, pair them with a cup of your favorite coffee or a glass of cold milk. I can’t wait for you to dive into this delicious creation! Let me know how yours turns out.

Red Velvet Cheesecake Brownies
Ingredients
Method
- Preheat your oven to 350°F (175°C). Grease or line a 9×13-inch baking dish with parchment paper.
- In a medium saucepan over low heat, melt the butter. Remove from heat and whisk in the sugar until combined.
- Fold in the eggs one at a time, followed by the vanilla extract until the mixture is smooth and shiny.
- In a separate bowl, sift together the flour, cocoa powder, baking powder, and salt. Gradually mix in the dry ingredients to the wet mixture until just combined.
- Stir in the red food coloring until evenly distributed.
- Pour half of the brownie batter into the prepared dish and spread it evenly.
- In a large bowl, beat the softened cream cheese until creamy. Gradually add the sugar and mix well.
- Add the eggs one at a time, ensuring each is well incorporated before the next. Stir in the vanilla extract.
- If using, add the flour for extra stability and mix until smooth.
- Spread the cheesecake mixture over the brownie base.
- Pour the remaining brownie batter on top of the cheesecake layer and gently swirl it with a knife.
- Bake in the preheated oven for about 35-40 minutes, until a toothpick inserted comes out with a few moist crumbs.
- Allow the brownies to cool completely in the baking dish before slicing into squares.


