Easy Ninja Creami Banana Ice Cream: A Sweet Slice of Joy
There’s something undeniably nostalgic about the scent of ripe bananas wafting through the kitchen, isn’t there? For me, it conjures up memories of lazy Sunday afternoons spent at my grandmother’s house. She would whip up her special banana ice cream, a treat we looked forward to all week. This Easy Ninja Creami Banana Ice Cream is my tribute to those heartwarming afternoons. It captures that same joy and brings it into the present while being wonderfully simple to make. Let’s bring that nostalgic feeling to your kitchen!
What Makes This Recipe Special
This banana ice cream is a game changer not just in its delightful flavor but also in the ease of preparation. Using the Ninja Creami, you’ll experience a creamy and velvety texture that’s hard to resist. Plus, this recipe is a great way to use up overripe bananas, turning them into a luscious treat without fuss. With just a handful of wholesome ingredients, you’ll be surprised how quickly you can indulge in this sweet, guilt-free dessert!
Ingredients
- 3 ripe bananas, peeled and sliced (the riper, the sweeter)
- 1 cup coconut milk (full-fat or light, your choice)
- 1/4 cup honey or maple syrup (for sweetness)
- 1 tsp vanilla extract (adds warmth and depth)
- Pinch of salt (to enhance flavors)
Optional notes: Substitute coconut milk with almond milk for a nuttier taste or use agave syrup for a vegan-friendly sweetener.
Step-by-Step Instructions
-
Prepare your bananas: Start by peeling and slicing your ripe bananas. If they’re spotty brown, that’s perfect! The sweeter the banana, the creamier your ice cream will be.
-
Blend the base: In a blender or food processor, combine the sliced bananas, coconut milk, honey (or maple syrup), vanilla extract, and a pinch of salt. Blend until you achieve a smooth and creamy consistency. You want it to be well-mixed but don’t worry about making it overly thick; a little thinness will help in churning.
-
Freeze the mixture: Pour the blended mixture into a freezer-safe container. Cover it tightly and let it freeze for at least 4 hours or until solid. I usually make mine overnight to make things easier.
-
Process in the Ninja Creami: Once the banana mixture is fully frozen, set it in the Ninja Creami. Select the “Ice Cream” setting and watch it work its magic. You’ll see that rich texture transform before your eyes!
-
Scoop and serve: After processing, you can either serve it immediately (it will be soft-serve style) or place it back in the freezer for a firmer consistency. When ready to serve, scoop it into bowls and enjoy!
Serving Suggestions
Family Fun Dessert
Top your banana ice cream with a sprinkle of crushed nuts, chocolate chips, or even a drizzle of warm chocolate sauce. Create a sundae bar for the family—everyone can customize their own!
Weekend Brunch Treat
Serve scoops of banana ice cream alongside pancakes or waffles as a fun brunch addition. It’s a delicious and creamy alternative to whipped cream or syrup.
Tips or Variations
- Flavor Add-ins: You can blend in some cocoa powder for a chocolatey twist or fold in peanut butter or almond butter for a nutty flavor.
- Vegan Option: Substitute honey with agave syrup to keep it vegan-friendly!
- Make it Fruity: Add in other fruits, like strawberries or blueberries, to create exciting flavor combinations.
- Quick Prep: To save time, freeze the banana slices in advance. You can take a handful out whenever you’re ready to make some ice cream!
Q&A Section
Can I use frozen bananas instead of fresh?
Absolutely! Frozen bananas can create an even creamier texture. Just ensure they’re ripe before freezing for the best flavor.
What if I don’t have a Ninja Creami?
You can still make this banana ice cream! Just blend and freeze the mixture, then stir it every 30 minutes until it’s fully frozen.
How long does this ice cream last in the freezer?
You can store it in the freezer for about 2 weeks. However, it’s best enjoyed within the first week to maintain the ideal texture.
Can I add other flavors like chocolate or nuts?
Yes! You can easily experiment with other flavors. Just fold in chocolate chips or swirl in your favorite nut butters after blending.
Behind The Scenes
Creating this recipe was a delightful journey filled with a bit of trial and error. I first tried with different milks and sweeteners, discovering that coconut milk offers just the right creaminess while balancing the sweetness of ripe bananas. Initially, I wasn’t convinced that the Ninja Creami would seamlessly churn everything together, but it surpassed my expectations—and trust me, my family was thrilled with the results!
Final Thoughts
Indulging in this Easy Ninja Creami Banana Ice Cream is not just about the delicious taste; it’s about savoring moments of joy and connection. Whether it’s a warm afternoon treat or an end-of-day dessert, this ice cream pairs wonderfully with shortbread cookies or a warm slice of banana bread. So, pack your freezer full of ripe bananas and let the nostalgia flow!
Can’t wait for you to give this a try! Let me know how yours turns out. 🍌
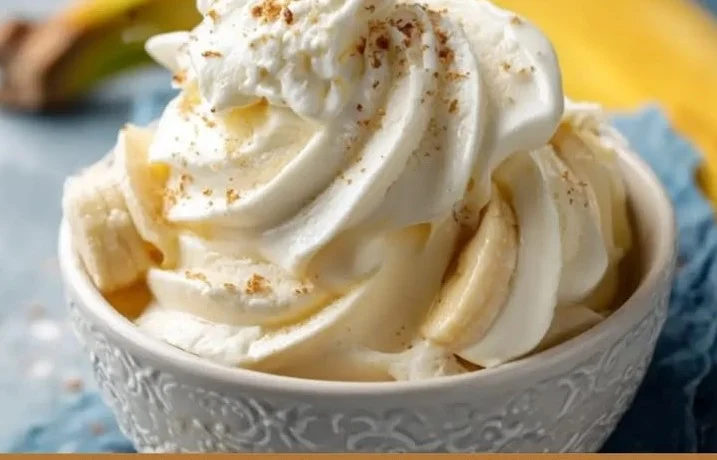

Ninja Creami Banana Ice Cream
Ingredients
Method
- Peel and slice your ripe bananas. The sweeter the banana, the creamier your ice cream will be.
- In a blender or food processor, combine the sliced bananas, coconut milk, honey (or maple syrup), vanilla extract, and a pinch of salt. Blend until smooth and creamy.
- Pour the blended mixture into a freezer-safe container, cover tightly, and let it freeze for at least 4 hours or until solid.
- Once the banana mixture is fully frozen, set it in the Ninja Creami and select the 'Ice Cream' setting.
- Serve immediately for soft-serve style or return to the freezer for a firmer consistency. Scoop into bowls and enjoy!


